What are the Methods to Use a Private WiFi Address on Apple Watch?
Apple watches use different Mac addresses with each WiFi. This helps in preventing network operators from tracking the activity of different WiFi networks. A device must identify itself to the network with a new network address known as the media access control. This helps to communicate with the WiFi network.
The network providers and other network observers can relate the address when your Apple uses the same WiFi Mac address across all networks. It can easily connect to the network activity of the device and its location over time.
But if you want, you can use a different Mac address for each WiFi network. Thus preventing tracking or profiling the Apple watch. Over here, we will learn how to use a private WiFi address on an Apple Watch to protect your privacy.
What are the Uses of Private WiFi Addresses?
A private address reduces the tracking of Apple watch, thus protecting privacy across different wireless networks. As mentioned, a device must identify itself to communicate with a WiFi network. If you have any, then you can set your Apple watch with iOS 14, iPad and watchOS 7 to use separate Mac addresses for each wireless network.
This will reduce the risk of tracking and will eventually boost your online privacy. The network might not be able to extract identifying information because of the latest Mac addresses like the device’s name, brand, type etc.
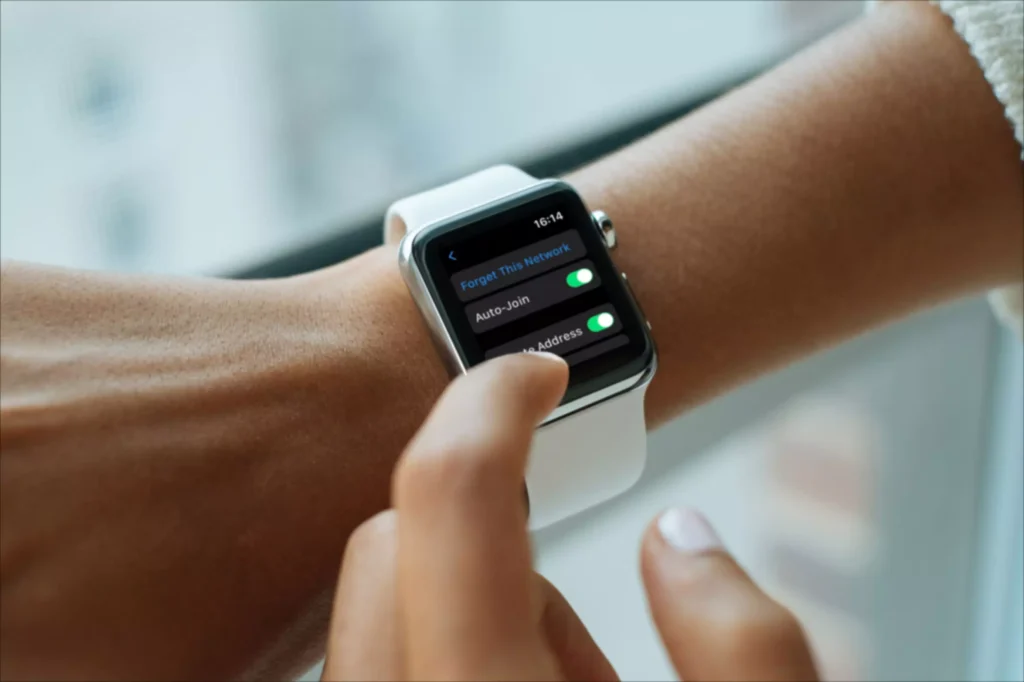
What are the Steps for a Private WiFi Address on Apple Watch?
In case you are always using the actual Mac address of the device, then it becomes easier for the device to identify and track it. A randomised address is viewed as a new network device, thus causing you to see a new network device. We have given the tutorial with all the steps to randomise the Mac address of the device and follow the steps accordingly.
- First, open the setting app and then hit the WiFi option.
- After that, you need to tap the name of the network that you joined.
- Then you need to enable the private address, and to do so hit the switch next to it. Below the toggle, you will see the address has been displayed. A warning will be displayed when connecting to a WiFi network that does not use the private address feature.
- This way, you can switch the Apple watch from its actual Mac address to a randomised Mac address.
Problems With Private WiFi Addresses
Some routers might be configured to notify you in case a new device joins the network. For example, your router might support this feature to inform in case the neighbour rogue is trying to connect the network.
A notification might come when your device with the private address joins the network first. From Apple, you will get advice for leaving the settings on that support it. You might come across the router and network configuration.
Thus restricting or no internet access while using a private address. If you notice any message that says no internet access, then you can enable the aeroplane mode for a few seconds. And after that, disable it. Finally, if nothing works, then stop using the private address.
Conclusion…
So this was all the way to use a private WiFi address on an Apple watch. We have mentioned the steps that will help you to resolve the issue. Further, we have also mentioned the information that you need to move forward.