Netgear Extender IP Address: How to Find it & Troubleshooting Tips
Netgear allows users to set up the Wi-Fi extender using the default IP address. Troubleshooting the connectivity issues becomes easier if you know the Netgear extender IP address. Besides, you can access the device’s login page using its default gateway IP.
Did you buy a new Netgear extender? You might need to learn about the steps to check its IP address. Let us clarify that finding your wireless extender’s IP address is pretty straightforward. You only need to access the router’s web GUI to get this information.
However, you must know the wireless router’s IP address and login credentials. Otherwise, you can’t open its web interface and find the Netgear Wi-Fi extender’s default IP address. Moreover, users must update the browser before accessing the router’s setup wizard.
Let’s learn how you can find the Netgear extender’s IP address without an expert’s help:
How to Find Netgear Extender IP Address via Routr’s Setup Wizard?
Connect the wireless router and the Netgear extender to the same Wi-Fi network. Open a web browser from your Windows or Mac device and enter the router’s IP address. Press the Enter button or click the search icon to access the login page.
Provide the primary router’s login credentials and click “Login”. You will find the connected device list on the router’s home page. Can you see the Netgear extender name on the list? Click it to see the default IP address next to the Wi-Fi extender’s name.
How to Find Netgear Extender IP Address via Command Prompt?
The easiest way to obtain the IP address is by connecting the PC to the Netgear extender on the same wired/wireless network. Do you want to create a wired connection? Ensure the router and extender are connected via an Ethernet cable securely.
Press the Windows and X keys simultaneously and select “Run” from the built-in Windows tool list. Enter “cmd” and hit the Enter button to access the Command Prompt window. Write “ipconfig” and press “Enter” to check the Netgear extender’s IP address on your Windows 10/11 PC.
What is the Default Netgear Extender IP Address?
Netgear has assigned the 192.168.1.250 IP address for its Wi-Fi extenders. However, sometimes it might vary from one Netgear extender model to another. Thus, you must check the user manual to find this Netgear product’s default IP address. Alternatively, users can take the ISP’s help to find the device’s gateway IP.
How to Set Up Netgear Extender with the Default IP Address?
Most Netgear Wi-Fi extender users take a professional’s help for the initial setup. However, you can do that using the Netgear extender IP address easily. Besides, you must ensure the router is compatible with the Wi-Fi extender. Otherwise, the home router will fail to establish a secure connection with the extender.
Plug in the wireless extender’s power cable to the wall outlet. The power LED will turn solid green when the Netgear extender is on. Press the Wi-Fi extender’s On/Off button if the power light is off. Connect the Windows or Mac device to the Netgear extender’s Wi-Fi network.
Most Netgear extenders’ default network name is “NETGEAR_EXT”, and the password is “password”. However, you might find no password on some Netgear Wi-Fi extender models.
Did you receive the “No Internet” error message? Disconnect and reconnect the PC or laptop to the extender’s network to fix the problem. Additionally, you must check whether the power cable is loose. Unplug and replug the Netgear extender’s power cord and follow these steps for a hassle-free setup:
1. Enter the Netgear Extender’s IP Address
Open a browser from your Windows or Mac device. We recommend using Chrome for your Windows 10/11 PC and Safari on your Mac laptop to avoid security issues.
Go to the web browser’s address bar and write “192.168.1.250”. Press the Enter button and wait until the New Extender Setup page displays. This web page won’t open if you enter an incorrect IP address.
2. Select the Wi-Fi Extender’s Admin Credentials
Click “New Extender Setup” and select “Yes” or “I Agree” if a confirmation message appears. It’s time to choose secure admin credentials for the Netgear extender.
These credentials will help you to access the Wi-Fi extender’s setup page. Combine letters, numbers and special characters like “#@” on the username or password. Decoding such usernames/passwords will be difficult for online predators.
3. Choose Security Questions for Password Recovery
Select and answer two security questions from the Netgear extender’s drop-down list. These questions will help you recover the device’s admin credentials if you forget them. Click “Next” and tap “Yes” or “Continue” if the extender asks you to take Netgear Genie’s help.
4. Select a Wi-Fi Channel
Your Netgear Wi-Fi extender will start scanning for the available Wi-Fi networks. Choose a 2.4 GHz or 5 Ghz Wi-Fi network when prompted. Click “See More” if you don’t see any Wi-Fi network name once the extender completes scanning.
5. Check the Netgear Extender’s SSIDs & Passwords
Choose “Next” when the next window appears and enter the existing Wi-Fi network’s password. Click “Next” and select SSIDs and passwords for the Netgear Wi-Fi extender.
Netgear’s default SSID for the 2.4Ghz network is “_2GEXT” and “_5GEXT” for the 5GHz network. It uses the same password for these two wireless bands. Do you use Netgear mesh extenders? Tap on “Enable One Wi-Fi Name to use the same Wi-Fi name and password as your existing wireless network.
6. Connect a Device to the Extender’s Network
Click “Next” on the next window to save the Wi-Fi name and password. It might take a few minutes, so don’t close the Netgear extender’s setup window. Place the Wi-Fi extender close to the wireless router to avoid connectivity issues.
Your Netgear extender will display the wireless network name (SSID) and password for its two bands – 2.4 GHz and 5 GHz. Copy these details into Windows or Mac device’s clipboard or notepad. Now, turn on a mobile device you want to connect to the Netgear extender.
Access the device’s Wi-Fi menu and choose the Wi-Fi extender’s SSID from the list. Return to the web browser page, scroll down, and put a tick mark next to the checkbox. Tap on “Continue”, and your Netgear extender can now extend the wireless router’s network coverage.
How to Log in to Netgear Extender using the IP Address?
Most users must know they can change the security type or SSID by logging in to the Netgear Extender. Additionally, you can disable the device’s features that are enabled by default. Check the attached device’s number and internet status by learning to log in using the Netgear extender IP address.
Do you want to generate a new password for the Netgear extender? You must know the steps to access the Wi-Fi extender’s login page. Here are the simple steps to log in to the Netgear extender:
- Open a browser from the PC or phone connected to your Netgear Wi-Fi extender.
- Write “www.mywifiext.net” in the browser’s address bar if your wireless router and extender use different SSIDs.
- Enter “http://192.168.1.250” in the address bar if the extender and router use the identical SSID.
- Press the Enter button or click the search icon to open the Netgear extender’s login page.
- Go to the username field and write the default admin user name.
- Head towards the password box and write the default Wi-Fi extender password.
Note: Your email address might be the Netgear extender’s username.
- Tap the Username & Password Help link if you forget the device’s default username or password.
- Click “Log in” or hit Enter to open the Netgear extender’s status page.
- If the browser displays a Menu icon, tap it to display the wireless extender’s menu.
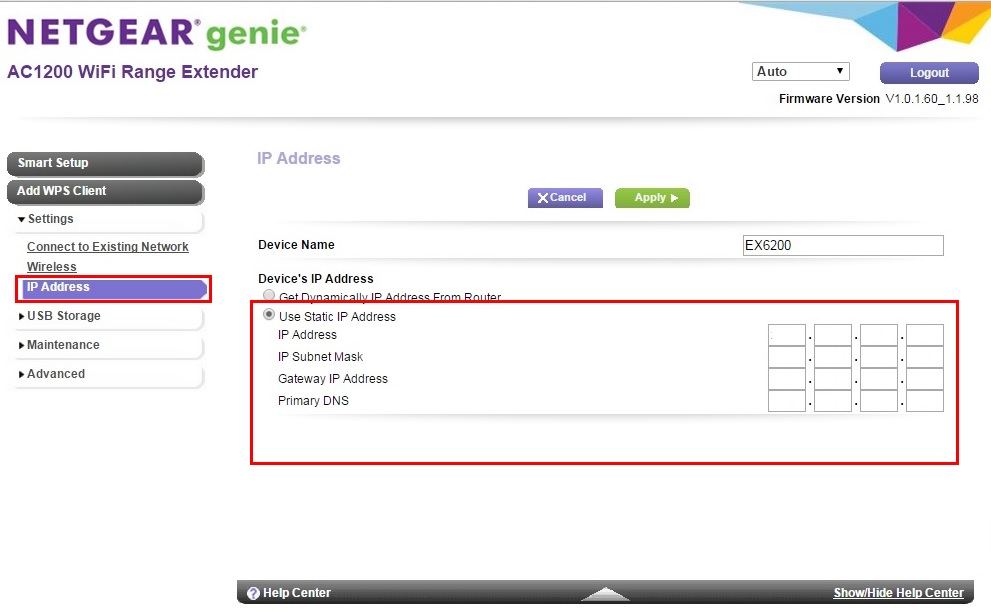
- Choose “Settings” and modify the Netgear extender’s configuration.
Unable to Access Netgear Extender IP Address? Try these Easy Solutions
Your Netgear extender might not display the login page if you enter an incorrect IP address. Thus, you must check the device’s default gateway IP to avoid this problem. An unstable internet connection can also restrict you from accessing the Netgear extender’s IP address.
Besides, you must ensure the range extender is on, and its power light must be green. The main Wi-Fi router connected to the extender can be at fault. You can encounter this problem if the router’s power cable is loose.
A frayed wireless router power cable can also be the reason behind such an occurrence. So, you must check if there is any sign of damage on the router’s cables. Replace the existing power cable with a new one to fix this connection error.
Moreover, an out-of-date Netgear extender and router firmware can cause IP address issues. Open the router and extender’s web interface and install their latest firmware.
Alternatively, you can access the router or extender manufacturer’s website to update the firmware. Disconnect and reconnect the mobile devices like computers to the Netgear extender and try accessing the IP address without glitches.