Arris Router Bridge Mode Setup (Step by Step Guide)
Arris router is one of the acclaimed brands known today. Users are attracted to this router because of its high speed and smooth connection. It might be possible that you are trying to access the Arris router bridge mode, but don’t know the steps to do so, then you are in the right place.
We will provide you with the right guidance to do so. But, before, we must know what this bridge mode is. Bridge mode basically means disabling the router or modem’s NAT function. Specifically, this setting allows users to use their respected router to bridge another router within the proximity for other devices to connect easily.
This might be beneficial for you if you are planning to increase the reach of the internet within your workspace, or even in your household.
Below we will be discussing the steps that will help you out.
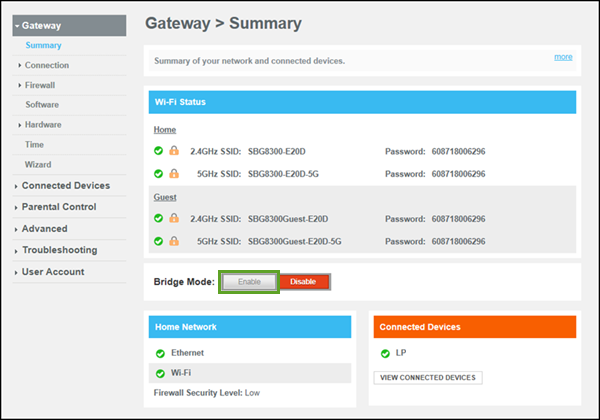
Steps to Access the Arris Router Bridge Mode
In most cases, it has been seen users get confused with the steps. To make it easier for you, we have got into more detail.
Right Spot for the Router
This step will make sure that you have better performance from the router. Looking for the right spot does not mean relocating it go any farther. The main reason for this step is to remove all magnetic, electric devices or appliances around your router.
These devices or appliances can reduce or decrease the performance of the router. Thus, this step is essential, though it looks quite simple yet effective.
Power Cycle the Router
Restarting the router or the gateways can help you access the Arris router in bridge mode. The instructions that are given below are quite simple, so you can easily perform them.
- First, you need to remove the AC cord from the power source. Make sure not to press the power button.
- It is your choice whether you want to remove the cord from the back of the device or from the wall outlet.
- Now, wait for at least 15 to 20 seconds and plug the cord back.
- You are recommended not to access the router right after your plugin. You need to wait for the system to reinitialise completely.
Configure the Static IP of the Laptop or Computer
In this step, you need to set up the ethernet card on your device as a static IP. Below we will discuss the steps to configure the static IP.
- First, you need to go to the Settings or Control Panel or the System Preferences on the computer.
- Now, search for network and internet options. Also, select the connection or network you are currently on.
- Finally, you need to locate the IP Settings and search for the button to edit or configure. And, also to find the IPv4 option and modify it.
- As your router is in bridge mode, it won’t assign an IP address to start with. This can interfere with your connection and access. This will assign you an IP address even in bridge mode.
Connect the Ethernet Cable to the LAN port
In this step, you need to connect the router or the modem directly to the laptop or computer you are using with the help of an ethernet cable. But, before that, compute the IPv4 option or the static IP part on the device you will be connecting to. Thus, making sure that the connection is stable without any interference.
Opening GUI on a Browser
This is the final step that you need to perform. In the admin configuration panel address, you need to type. You can use the newly changed static IP in the address bar. You will be asked to give the Username or the password for configuration purposes. Usually, this information will be asked on the Arris gateway. Now, you will be allowed into the Arris GUI on the browser irrespective of the fact that the bridge mode is on.
Conclusion…
These are a few ways that you need to go through. You need to follow the given instructions. It might look a little difficult, but you will find it quite accessible once you initiate the steps. In any difficulties, you can contact the manufacturer.