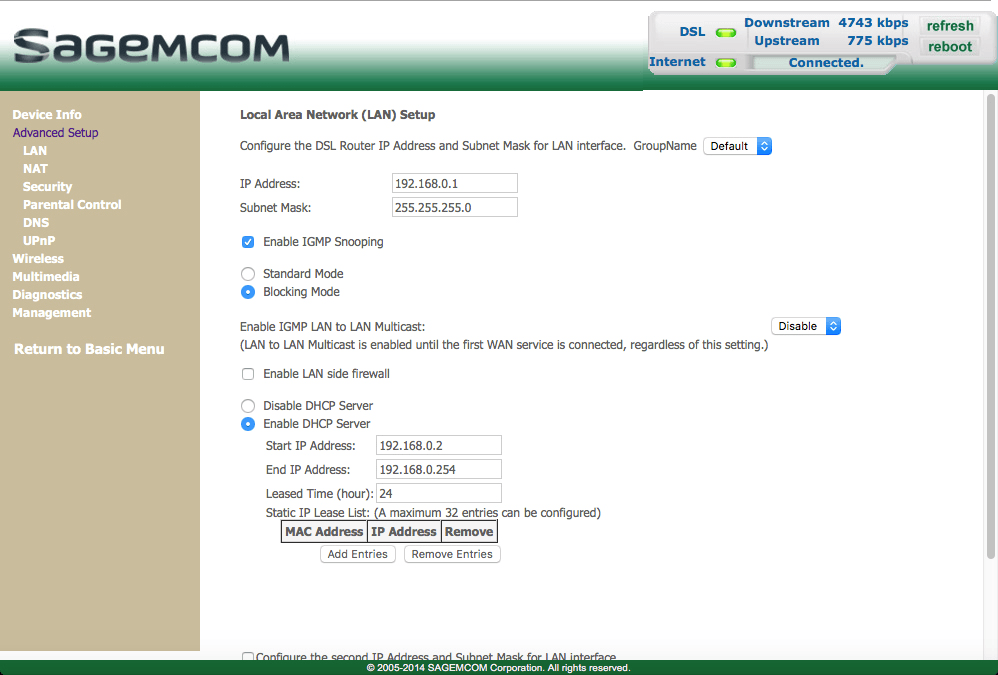
Sagemcom Router DNS Configuration: A Comprehensive Guide

Routers are one of the primary network devices to manage internet facilities across homes and offices. Whenever you connect your router to a particular Internet Service Provider, it automatically obtains the setting details from the ISP. One of these default settings is the DNS. DNS stands for Domain Name System, and it translates web addresses into IP addresses.
If you have a Sagemcom router, then it works similarly. DNS configuration helps in fetching any URL by converting it to its definite and registered IP address. However, you might need to change the Sagemcom router DNS configuration.
If you don’t want your ISP to control the DNS mapping, then you can go for the Sagemcom router DNS configuration. Changing the DNS configuration is not that difficult, but it might vary from one Sagemcom router model to another.
Let’s check some whereabouts regarding the Sagemcom router DNS configuration and how you can change it.
Why Should You Change the Sagemcom Router DNS Configuration?
This question might pop up in your head when everything goes smooth with the automatic DNS configuration from your ISP. However, every Internet Service Provider might be using its DNS settings, which can act differently. For instance, your search for a definite website through the automatic Sagemcom router DNS configuration.
After a while, it shows you that the website doesn’t exist. But, you know deep down that it does. Therefore, ISP hijacking is an issue that might demand a change in the Sagemcom router DNS configuration.
When you change the DNS configuration on your router, it becomes the mandatory DNS setting for every device connecting to the router. So, it’s the easiest way to assign different DNS settings to every connected computer when you use the Sagemcom router DNS configuration process.
What are Possible DNS Addresses that You can set?
There are two great recommended DNS addresses that you can use besides your ISP default DNS address. They are Google Public DNS and OpenDNS.
Here are the following DNS addresses for Google and Open DNS services, respectively
- Use 8.8.8.8 and 8.8.4.4 as Primary and Secondary DNS addresses, respectively, for Google.
- Use 208.67.222.222 and 208.67.220.220 as Primary and Secondary DNS addresses respectively for OpenDNS.
How to Set Up the Sagemcom Router DNS Configuration?
The Sagemcom router DNS configuration page is available under the router’s web interface. Therefore, you need to access the web-based utility of the Sagemcom router through a PC or equivalent device.
Here are the detailed steps to change the DNS configuration on your router:
Log in to the Router’s Web-Based Utility
You have connected your computer to the Sagemcom router. You can use an ethernet cable or the SSID-password combo to join the wireless network. After a successful connection, you can open any web browser on your PC.
Go to the address bar and type http://myrouter or http://192.168.1.1. Press the Enter key, and it will take you to the default login gateway of the router. If you have modified the IP address of the router, then you should provide the rectified IP address. After that, you have to type the username and password to enter the web control panel.
Click the Login button to see the Sagemcom router’s web-based utility.
Go to the DNS Settings Page Under the Web Dashboard
Once you have entered the router’s web admin panel, you must navigate to the DNS server page. Head towards the Advanced Settings option.
Under Advanced Settings, click the DNS option. Go to the DNS Server option and click on it. You need to check the radio button next to the option that states, ‘Use the following Static DNS IP address’. There are two boxes where you have to enter the Primary and Secondary DNS server addresses. Type the main DNS server address in the box next to the Primary DNS Server option.
After that, you have to type in the alternate DNS server address on the box next to the Secondary DNS server option. This Secondary DNS Server address is a backup option for the primary one. When the router can’t find the Primary DNS Server address it uses the Secondary DNS Server address.
Once you have input the DNS Server addresses, you can click the Apply or Save button to confirm the Sagemcom router DNS configuration.
Reboot Your Sagemcom Router
Users have also complained that configuring the DNS settings on Sagemcom routers might not be effective at once. Experts suggest that you should reboot your Sagemcom router along with other connected devices to experience the change in DNS configuration.
Therefore, make sure that you restart your router, computer, and other devices after performing the Sagemcom router DNS configuration. Otherwise, you might observe that changes to the DNS server might not be saved and effective.
How to Change DNS Configuration on Windows Computers?
Apart from the Sagemcom router DNS configuration process, you can assign a different DNS on your Windows device as well. This is relevant when you don’t want every device to be under a different domain. Right-click the Network icon from the taskbar and select the Open Network & Internet Settings.
When the window expands, click the Change Adapter Options link. Then, right-click the network connection that you’re using currently. Choose Properties and click the Internet Protocol Version 4 (TCP/IPv4) option.
Hit the Properties button and go with the option that says, ‘Use the following DNS server addresses’. Provide the Primary and Secondary DNS Server Addresses there. Save your changes and close the window.
Summing up….
Additionally, you can change DNS configuration on your A|ndroid, iOS, and Mac devices. If you want to keep the DNS configuration universal for your home network, then it’s best to go for the Sagemcom router DNS configuration. It’s easy to perform and you need not be tech-savvy. Hopefully, the guide was helpful.
