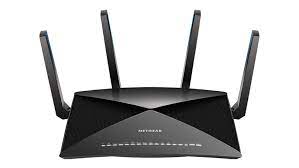
A Quick Guide On Netgear Nighthawk R9000 x10 AD7200 Setup

The Netgear Nighthawk R9000 is one of the smartest and fastest routers that come with a plex media server. The Plex media server is best for media streaming. The Nighthawk x10 Wi-Fi technology provides users with the 4K streaming experience, VR Gaming, and instant and unlimited downloads.
You will get a 7.2 Gbps MU speed in the Nighthawk x10 router. But to gain the best router experience, you first need to set it up properly or else you won’t be able to stream videos or games.
Netgear Nighthawk x10 Manual Setup
The steps to set up the Netgear Nighthawk x10 AD7200 are quite easy. First, you have to configure the router and then we will move to the log in part. After logging in to the router, you will be able to get the highest speed internet.
Step 1: Configure the Router
To set up the Netgear Nighthawk router, you first need to check all the plugs and the cables. If you plug in the cables in the wrong port, you won’t get the internet connection. So, to correctly set up the router, you have to go through certain aspects, such as:
- First and foremost, you have to remove all the cables that are connected with the computer.
- Now, plug in the modem with its power adapter and check if the power light is blinking.
Note: If the power light blinks this means that you have properly turned on the device. But, if the light isn’t blinking, you have to turn it on.
- Now, connect the router and to do that you have to first take one end of the ethernet cable. Put that Ethernet cable with the modem and the other one to the internet port of the router.
Note: You might face difficulty in finding the internet port because it is located apart from the rest of the ports of Netgear Ports.
- Link up the router with the computer. For that, you have to first plug the ethernet cable into the computer’s ethernet cable. Then, take the other end and plug it in with any of the ports of the router.
- And lastly, plug in the router power adapter. Wait for a minute until the power light blinks. If it starts blinking that indicates that you have successfully established a connection.
After configuring the router, you have to log in to the router. Once you get into the login page, you have to follow the required instructions from there to access it.
Step 2: Log in to the Netgear Nighthawk r9000
After setting the router, you have to go to the login page of the Netgear. But, you need to have an internal IP address of the Netgear Nighthawk to login. If you don’t have an IP address, then you won’t be able to access the router.
To get that login page, you have to do the below-mentioned steps:
- To start with, you have to connect the computer with the Netgear Router. Open a web browser next.
- Go to the address bar and write the Internal IP address of Netgear Nighthawk (“http://routerlogin.com”)
- Hit the Enter button next to get to the login page.
- When you are prompted with the Netgear login page, you have to give the nighthawk x10 r9000 default password and the username.
- Tap on the “Login” button to end the process.
If you provide an incorrect username and password to get into the login page, you won’t be able to log in. But, if you login successfully, you will get a popup message on the screen. Take help from the guidelines to complete the setup process.
Netgear Nighthawkx10 r9000 Setup using Application
You can even complete the setup using the Netgear application. All you had to do is, install the Nighthawk application in the smartphones and then follow the below-mentioned steps:
- Connect the antennas of the Netgear router first and then connect the modem to the Internet port.
- Hold the power button to turn on the router. The Wi-FI LED light will blink once you power on the device.
- Next, open the smartphone (whether it is android or iOS). Go to the Playstore, if you are an android user. For the iOS device, the users need to move to the App store.
- Go to the search bar and write “Netgear Nighthawk ”. From the searched results, tap on it.
- Tap on the “Download” button to install the app on the device.
Note: If you are an iOS device user, you will see the “Get it” option instead of “Download”.
- Open the Netgear application next and then follow the screen instructions to control the router using the Netgear app.
Now, you can access the router by just installing the app so if you are facing issues while getting into the login page via the web browser, you can try installing the app as an alternative method.
Additional Guide
At the time of setup, you might face issues. To get rid of it, you can have a look at the below-mentioned troubleshooting steps:
- You have to check whether you have plugged in all the plugs correctly. Also, check if you are using a faulty cable.
- You have to keep the router, modem and the computer in the same place to avoid connection issues.
- If you have linked multiple devices with the computer, you have to unplug the unnecessary devices.
- If you are getting login issues, you have to clear the cookies, caches and the proxies serve to overcome the error.
- Make sure the firmware of the router is updated.
