How to Turn on the Wireless Capability on Windows Devices (Ultimate Guide)
The latest Windows laptops have a built-in feature to turn on and off the wireless capability. This Wi-Fi button isn’t there on the Windows 8 or earlier versions. The Windows 7/8 users need to access the Wi-Fi menu and choose the network name to get internet access.
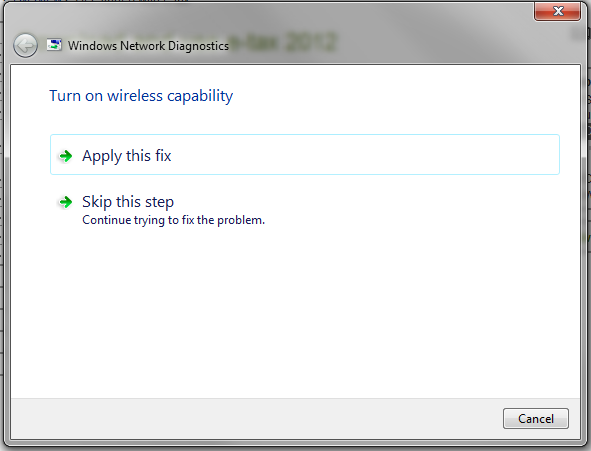
But, sometimes, the Wi-Fi might not turn on even after connecting the device to the local network. Usually, this occurs for disabling the network adapter. Enable the wireless adapter and ensure it is up-to-date to avoid these issues.
Place the wireless router close to the Windows PC. Otherwise, you might face problems enabling the wireless capabilities. Connect the router and laptop via an ethernet cable.
Turn on the modem and check the Wi-Fi configuration beforehand. Change the bandwidth frequency to get high-speed internet.
Do you use a Windows computer or laptop and need to know how to turn on the wireless capability? Here are three different ways to do that:
How to Turn on the Wireless Capability on Windows devices using Software Switch?
The steps to connect the computer/laptop to Wi-Fi are different in different OS. In the latest Windows devices, you can enable wireless capability from Settings. However, the Windows 7 or 8 users can’t do that. You have to access the Control Panel program to get the internet connection.
How to Turn on the Wireless Capability on a Windows 11 PC?
Press the Windows, and I keys simultaneously to open the Settings window. And, go to the search box, write “Network” and choose “Network & Internet”. When the new window opens, head to “Wi-Fi” and move the toggle from left to right. Select the right wireless network name from the list, open a browser and check if you can use the internet.
How to Turn on the Wireless Capability on a Windows 10 Device?
Power on the Windows computer or laptop, tap on the Windows button and click “Settings”. Opt for “Network & Internet”, and locate “Wi-Fi” from the option list. Now, it’s time to move the Wi-Fi slider from “Off” to “On” and look for the SSID from the available network list.
Select “Connect” when the pop-up window opens and choose “Enable Wi-Fi”. Fail to connect the device to the internet? This indicates something is wrong with the router. If the router’s internet LED is blinking continuously, reboot the device. And, reconnect the computer to Wi-Fi and browse the internet without hassle.
How to Turn on the Wireless Capability on a Windows 7 PC/Laptop?
Hold the Windows and R keys together, and write “control” when the Run box pops up. Hit the Enter button to access the Control Panel program. Move towards “Network and Internet” and go for “Network and Sharing Center” when the new window appears.
Navigate to “change adapters settings’’, and right-click on the internet connection. Select “Enable” to connect the device to Wi-Fi. In some Windows 7 devices, this option will be displayed as “Connect”. Choose that to enable the wireless capabilities of the PC/laptop.
How to Turn on the Wireless Capability on a Windows 8 or 8.1 device?
Go to the search box, write “Network”, and press the Enter key. Open the Network window and turn off the Airplane Mode to stop all the wireless connections. And, head towards “Wireless Devices” afterwards. Enable “Wi-Fi” and disable the Bluetooth connection.
Didn’t get the Wi-Fi option? The Windows 8 computer might fail to detect the wireless network.
Ensure the router is on and it provides a stable internet connection. Turn on the flight mode and turn it off after a few seconds.
Further, you should never connect more than three devices on the same network. Disconnect the unwanted devices to restore the internet connection. Additionally, you should run the network troubleshooting tool to enable wireless capabilities. Reset the router if these solutions don’t work.
How to Turn on Wireless Capabilities on Windows Devices using a Wi-Fi button?
First, check if there’s a Wi-Fi button on the Windows device’s keyboard, and it will be beside the Esc key and F1 key. And, you have to press the Fn and F2 keys together to enable the wireless capabilities. But sometimes, the Wi-Fi might not turn on using this keyboard combo.
Usually, this happens when you disable the Function keys on the device. Boot the computer into Safe mode to resolve this problem. And, then open the Task Manager tool by pressing the Windows and X keys together.
Head to “Startup” and disable all the third-party applications. Restart the computer, press the F2 and Fn keys simultaneously, and it will turn on the Wi-Fi connection. Reset the network settings if that doesn’t fix the internet connectivity issue.
How to Turn on Wireless Capabilities on Windows PCs from Device Manager?
Open the Start menu, tap on “Control Panel” and choose “System and Maintenance”. Additionally, you need to choose “Device Manager”. Enter the administrator password when prompted and select “Yes”. Navigate to “Network Adapters” and right-click on the Wi-Fi adapter name.
Didn’t find the network adapter from the device list? It will be named “Wireless” or “802.11”. Choose “Enable” when you get the wireless adapter. It will enable the Windows device’s wireless capabilities. Open a web browser and check if you can access the internet. Reset the power management settings if there is no Wi-Fi connection.
How to Turn on Wireless Capabilities via the Wi-Fi Icon?
There is a Wi-Fi icon on the toolbar in the latest Windows 10 or 11 laptops. Tap on that icon and wait until the Wi-Fi menu appears on the Windows screen. Select the correct wireless network name and choose “Connect” afterwards.
Did you get the “Connected, Secured” message after enabling the wireless capability? This indicates the computer has connected to the wireless router successfully. However, if you get the “no internet” error message, power cycle the computer and router. Contact a router expert if you are facing problems connecting the PC to the internet.