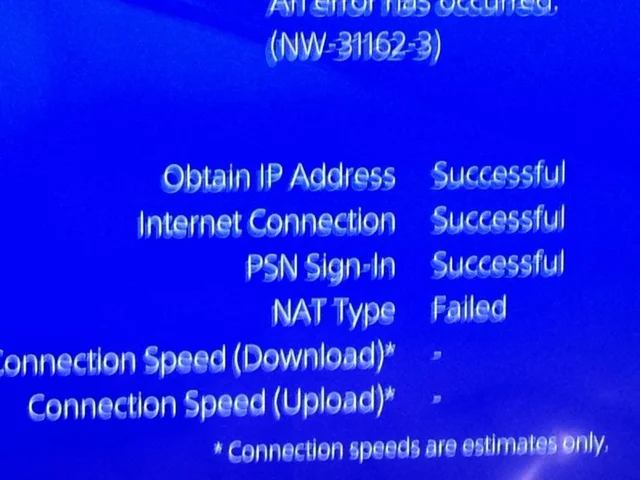
PS4 NAT Type Failed? 4 Major Solutions You Must Try
PlayStation is a sensation for gamers and it’s still famous for innovative launches. Recently, PS4 users have complained that they have been suffering from an error called PS4 NAT Type failed.
Glitches are very common when it comes to any device. Generally, it causes the chat and other network services to be unavailable while playing games on PlayStation 4.
What is the PS4 NAT type, by the way? As you know, NAT stands for Network Address Translation, and it translates public IP addresses into private ones and vice versa. Generally, there are three NAT types for PS4.
They are Open(Type 1), Moderate(Type 2), and Strict(Type 3). Network issues, incorrect configuration, and firewall interference can cause the PS4 NAT type failed error.
Let’s check out how you can bring the chatting feature back to PS4 and resolve the NAT type failure.
Perform a Manual Configuration of the PS4 Network
As observed in most cases, it is the improper configuration that you can blame for the PS4 NAT type failed issue. Therefore, if you configure network settings correctly, you can avoid the problem.
First, you should check out the IP address of the PlayStation 4 to make sure that it’s allocated correctly. Go through the following guidelines:
- Go to the main screen of your gaming console. Explore its Settings and navigate to a sub-category called Network.
- Next, navigate to the option that says, ‘View Connection Status’. Click on that option.
- The next page should let you witness the PS4’s IP address.
Verify if the PS4 has the right IP address. If it’s not using the right IP address, you can make it right. You just need a computer residing on the same network to which your PlayStation 4 connects. It’s important to use a device that has network details, and it will assist you in assigning the right configuration to your PS4.
Furthermore…
You need to abide by the following instructions to register the IP address to your PS4. Access your computer on the same home network and bring up a Run utility. If it’s a Windows computer, use the keyboard shortcut Windows+R.
Type in ‘cmd’ in the Run box and hit the Enter button. Command Prompt will appear on your Windows screen, and run the ‘ipconfig /all’ command.
Note down the network interfaces and their details so that you can insert them when needed. Next, you have to go back to PS4 and make the following changes:
- Open up Settings and select the Network option. Next, click on the ‘Set up internet connection’ option.
- Several choices will appear on the PS4’s screen, and it will let you choose the medium you want for an internet connection. Choose the option that suits your requirements.
- Next, choose the Custom option from the next page. As we have to manually enter the network details, that’s why we chose the Custom option.
- Select the ‘Do Not Use’ option from the Proxy Server Page and continue to the next page.
- Then, you have to provide the necessary details regarding the wireless network and test the connectivity. The NAT type should be 2 here.
Once you have manually configured the network settings, now you can expect the PS4 NAT type failed error to be fixed. Check if you can use the chatting feature on PS4.
Try Universal Plug and Play for Your Wireless Router
Universal Plug and Play give you the option to automatically configure NAT tables for your gaming console. If you don’t find the first solution helpful, then you can try this hack.
Enable the Universal Plug and Play feature on your router and check if it eliminates the PS4 NAT type failed issue:
- Start with logging into your router’s web-based control panel. Use your computer’s browser to enter the default gateway of your router.
- According to your router’s brand, model, and brand, you have to find the option inside the interface. Find the UPnP Menu and activate the service.
- Save the changes you have made so far. Next, you have to power cycle the router and the PS4 device.
- Now, you can check the internet connectivity on your PS4, and it shows the right NAT type or not.
Activate Demilitarised Zone Server for Your PS4
If the Universal Plug and Play haven’t solved the problem, you have to move on to this solution. Demilitarised Zone or DMZ is a physical or logical subnetwork that lets a network face an unauthorised connection or the internet.
Here, you have to use your PS4 as the DMZ host using the following steps:
- Open up the PS4’s network settings and note the IP address.
- Now, sign in to the router’s web admin interface. Use the default IP gateway of the router and provide login credentials to log into the router’s control panel.
- Navigate to the router’s DMZ menu or layout. You can find this sub-category under Forwarding or NAT.
- Type in the PS4’s IP address there and confirm your changes by clicking on the Save option.
Finally, you can power cycle both the PS4 and router. Fire up the gaming console and check out the internet status.
Try Port Forwarding
You can improve the PS4 NAT type failed instance by forwarding the port. Changing the port among the possible combinations can enhance communication.
Here’s how you can make it possible:
- Enter your router’s web-based admin interface. Check out your router’s IP address, username, and password or its user manual to enter its control panel.
- Next, you have to navigate the dedicated Port Forwarding option under the control panel. Before you add ports, you need to ensure that your PS4 has a definite name and IP address for each port.
- After that, you have to include the following ports on the router’s port table: 80 (TCP), 3478 (TCP and UDP), 443 (TCP), 3480 (TCP), 3479 (TCP and UDP).
- You can now save your progress.
Proceed with power cycling your router and PS4. After that, you can notice if the PS4 NAT type failed issue still persists or not.
Additional Workarounds
If you are still facing the PS4 NAT type failed error, try switching to an Ethernet rather than a Wi-Fi connection. Additionally, you can disable the IPv6 protocol, change the DNS server, or enquire about the Internet Service Provider. Go for an expert intervention if nothing fixes the problem.