Asus Router Load Balancing — How does it Work & When Should You Use it?
Asus included a load balancer mode in the latest dual-WAN routers. It allows you to distribute the load between the primary and secondary WAN. Users can configure the wireless devices either to the primary or secondary WAN in this mode.
For instance, after enabling this feature, connect the game console to the LAN to use the primary WAN. And, then connect the smartphone or laptop to the other WAN port.
Asus router’s load balancing feature offers a plethora of benefits. It prevents overloading on a single WAN connection and improves router performance. An advanced Asus router reduces the bandwidth latency and also provides super-fast internet.
Moreover, internet traffic routing becomes easier when the load is evenly distributed. Asus router load balancing mode might be useful when the internet is down.
Now, let’s see how to set up the Asus router in the load balancing mode:
How to Enable the Asus Router Load Balancing Feature?
Asus router load balancing prevents unwanted network downtime. Improve the streaming and gaming experience using this router mode. Besides, the load balancer mode increases the network security.
Prevent hackers from accessing the wireless network using this feature. And, configuring load balance on the Asus router isn’t that difficult. Every dual-WAN router user can do that using the following steps:
Connect the Cables
First, turn on the Asus router and the Wi-Fi enabled devices. Then, connect the primary ethernet cable to the router’s WAN port. Now, plugin the secondary ethernet cable to the LAN port. Note down the port number of the connected devices.
Did you connect a Windows device to the router? Hold the Windows and R keys together and write “cmd” in the Run box. When the Command Prompt window opens, write “netstat -a” and press “Enter”.
It will show you a list of connections and the port numbers currently in use. This built-in Windows tool might take 9-10 minutes to complete the process. Don’t close the window until then. Once done, check the Wi-Fi speed, and open a web browser. If the browser takes time to load, restart the router to fix this connectivity issue.
Enter the IP address
Now, go to the browser’s URL bar and write the dual-WAN router’s gateway IP. Press the “Enter” key and check if the login page opens.
Did you get any error messages? This indicates you have entered an incorrect IP address. Check the router’s default gateway to avoid this error.
But, if you are unaware of that, tap on the wireless network icon. Choose the right network name, and select the “Properties”. Navigate to the “IPv4 DNS Servers” section and check the wireless router’s IP address. Or, you can open Settings, choose “Network & Internet”, click “Wi-Fi” to get the gateway IP.
Login to the Router
Enter the smart Wi-Fi router’s default username and password on the login page. Press the “Sign In” button or hit the Enter button to open the setup wizard. But, this web page might not open if you don’t know the login credentials. Check the router manual to find out these details. Or, you might get the username/password on the product label.
Most Asus dual-WAN routers use “admin” as the username and password. But, this might vary from one Asus router model to another. Did you change the device’s password? Then, enter the new password instead of the default one. And, consider resetting the router if you forget the password/username.
Access the WAN Page
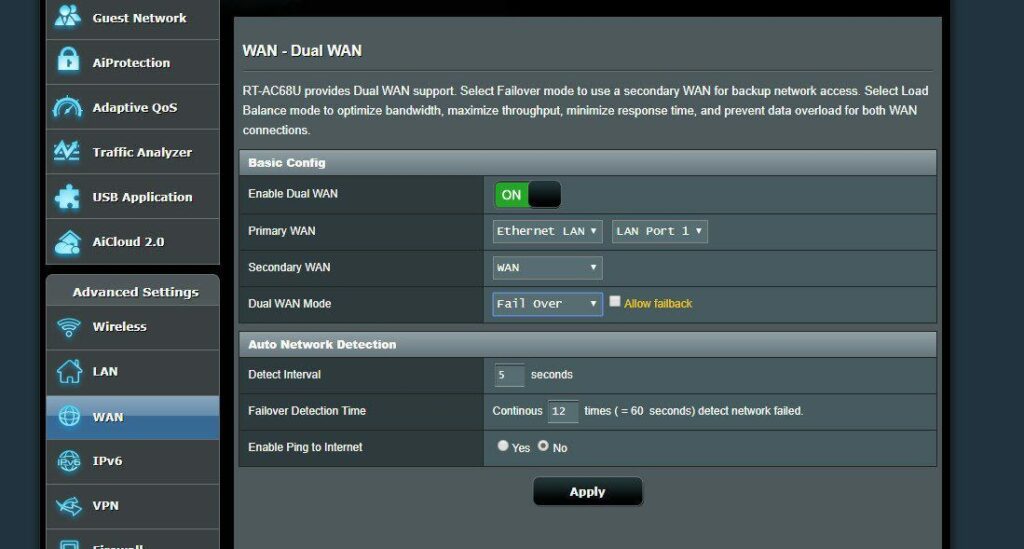
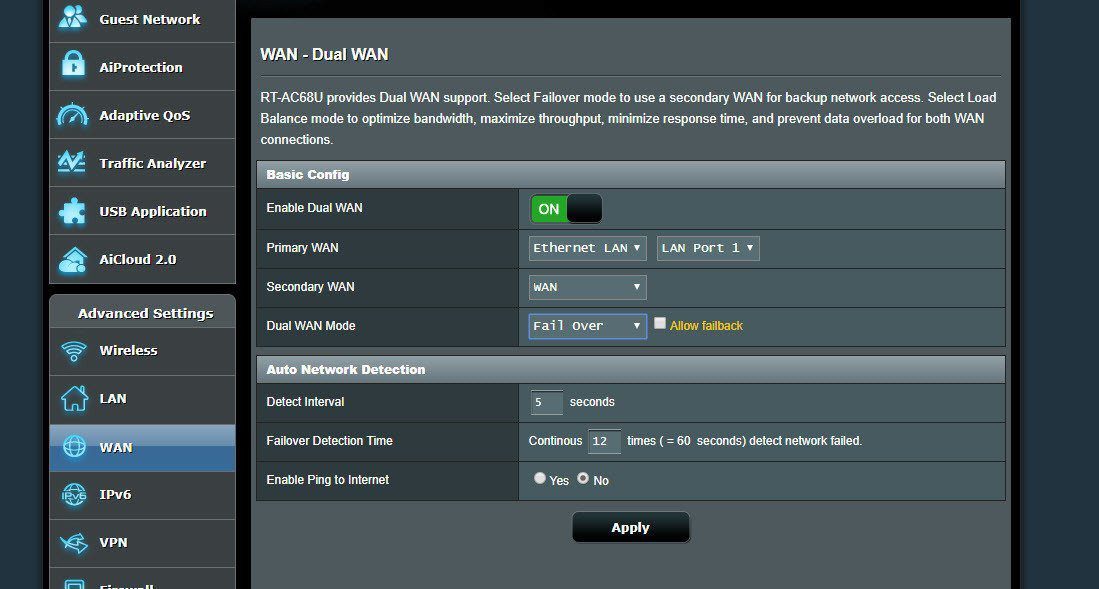
The web interface will open if you have entered the correct login information. After that, locate the “Advanced Settings” menu, tap on “WAN”, and select “Dual-WAN”. This option might not display in a router that doesn’t support dual WAN functionality.
Next, go to the “Basic Config” section and move the “Enable Dual WAN” slider from left to right. Choose the primary and secondary WAN connection type from the menu. Go with “Ethernet LAN” if the router and the computer are connected via an ethernet cable.
A “LAN port” option will pop up after changing the secondary WAN to “Ethernet LAN”. After that, choose the right port number from the list. And, click “USB” when using a USB tethering device, like a phone or 4G modem. Otherwise, select “WAN” while connecting the router to wireless devices.
Configure the Asus Router Balancing Mode
After changing the WAN configuration, now it’s time to choose the “Dual WAN Mode”. Select “Load Balance” to maximise the response time and throughput. Move towards the “Load Balance Configuration” section to change the load ratio.
You might not know what to write here if you haven’t configured the Asus router balancing feature. Well, you can keep the ratio as 1:1 to enable a 50-50 balancing. This ratio will provide the same Wi-Fi speed in the bandwidth channels. Change the load ratio to 3:1 if you want more bandwidth in the wireless channels.
In this case, if you have 5 files to download, the first three and the last one will use the primary WAN connection. And, the fourth file will be downloaded through the secondary WAN connection. Once you set the ratio, click “Apply” to complete the load balance configuration.
Change the Secondary WAN Connection Type
Don’t close the setup page without configuring the secondary internet connection. Go back to the “WAN” page, and move to the “Basic Config” section. Click “WAN Connection type” and change it to PPIP or PPPOE. Contact the ISP if you aren’t sure about the internet connection type.
When shouldn’t you use the Asus Router Load Balancing Mode?
Disable the load balancer mode when you face frequent downtime on one of the connections. Otherwise, it might take ample time to route the traffic through the WAN ports. Enable the router’s “Fail Over” feature in such circumstances to resolve the issue.
This dual WAN mode uses the primary connection all the time. Besides, it switches to the secondary connection when the primary WAN fails to work. Choose a fail over detection time to check the network status without hassle.
Failed to enable the Asus router’s dual-WAN feature? Update the router firmware and change the device’s position to overcome this problem.