Asus Rog Rapture GT-AX11000 Setup — A Complete Guide
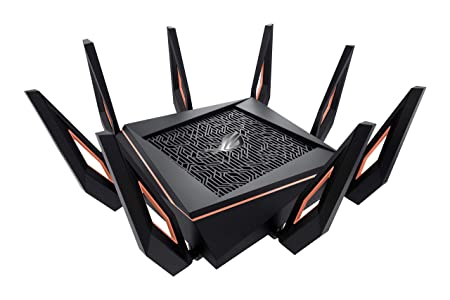
Asus introduced several high-end gaming routers, and Rog Rapture GT-AX11000 is one of them. This AiMesh router delivers average data throughput of 11,00Mbps. It has eight external antennas to extend the network coverage.
Many professional gamers installed this tri-band router to get uninterrupted internet access. GT-AX11000’s MU-MIMO technology allows you to connect multiple devices simultaneously.
Besides, Asus included a Game First to ensure hassle-free online gaming. Reduce the ping and lagging issues with the Game Boost feature. It also analyses the network traffic and prioritises the gaming packets efficiently. Asus GT-AX11000 is compatible with the latest gaming consoles, including Xbox One. ROG Rapture provides secure internet connections to the game servers.
Moreover, this wireless router features a port forwarding option that prevents network issues. Its Game Radar function lets you check the ping times of the different servers. But, you need to opt for the Asus ROG Rapture AX-11000 setup first. Otherwise, you can’t use these exclusive features. Many consider a professional’s help to install this smart Wi-Fi router. But, you can do that without any technical experience.
Did you recently buy the Asus ROG Rapture AX-11000 router? Follow these steps for an easy setup:
Where to Install the Asus ROG Rapture AX-1000 Router?
It is important to set up the router in the right place. Otherwise, you might experience internet dropping issues. Place this tri-band gaming router at the corner of the home/office. It will help the users to get the best network coverage and Wi-Fi range.
And, this Asus wireless router should be close to the computer or smartphone. Do you connect the router while watching online content on the smart TV? Keep it close to this device for a seamless streaming experience.
This networking equipment should be kept away from Bluetooth devices. Moreover, this Wi-Fi router has two mounting holes, making the setup process easier. Users can also mount the router against the wall. It has Wi-Fi 6 technology and supports a 20MHz bandwidth frequency. Upgrade the firmware to increase the wireless range even more. Restart the router when it generates issues to connect the compatible devices.
Factors to Consider before the Asus Rog Rapture GT-AX11000 Setup
Update the web browser in the first place. Connect the ethernet cable of the modem to the GT-AX11000’s WAN port. Then, plug in the power cables of the computer and the router. Use an ethernet cable to connect the wireless router with the PC.
Check the LAN port before that. If there is any wear and tear in this port, repair it immediately. And, then connect the power adapter into the GT-AX11000’s DCIN port. Press the Power button of the Asus router and wait until the power LED turns green. Disable the WPS mode when the power light starts blinking.
Easy Steps to Asus Rog Rapture GT-AX11000 Setup
First, open a reliable web browser, go to the URL bar and write 192.168.1.1. Press the “Enter” key to be directed to the login page. Provide the default username and password, “admin”, and click “Sign In”. It will open the ROG Rapture AX-11000’s configuration page.
Go to the “Network Map” section to manage the network clients. Additionally, you can check the DNS server address there. Monitor the USB activities and check the Wi-Fi status from this section.
Head to the “System Status” section to change the security settings. These include SSID, security level and also the encryption settings. Besides, users can set up different security settings for the dual bands.
Change the “Authentication Method” to WPA-2 Personal to enhance web security. Select “Apply” and proceed to the “General” tab afterwards. Choose “Wireless”, and then select the wireless band.
Enable “2.4Ghz” while performing the low-bandwidth activities. And, choose the 5GHz bandwidth while gaming or streaming high-resolution videos. Toggle on “Smart Connect” to remove the hassle of choosing appropriate bands. Now, it’s time to set a unique 32 character network name. Click the “Hide SSID” option to secure the wireless router from vulnerabilities. Furthermore, you also need to choose a wireless mode for the devices.
Which Wireless Mode will be Ideal for Asus ROG Rapture AX-11000?
Different kinds of devices require different kinds of wireless mode. Do you use a device that supports the 802.11ac standard? Choose “Auto” from the list immediately. Moreover, this Wi-Fi mode is compatible with the 802.11n and 802.11g devices.
Consider selecting “N Only” to maximise the network interference. But, if you need to connect 802.11g and 802.11b devices to the router, disable this wireless mode to prevent further issues.
Choose “Legacy” to allow 802.11b/g/n devices to connect to AX-11000. However, the devices that support only the 802.11n standard will operate at 54Mbps in this mode. Move towards the “operating/control” channel tab and select “Auto”. It allows the tri-band router to connect to the wireless channels automatically. Choose the suitable authentication mode and click “Apply”.
How to Set up the WPS Function on Asus ROG Rapture AX-11000?
Setting the WPS feature is pretty simple and less time-consuming. First, go to the “Wireless” section, locate the WPS option, and select “Enable WPS”. And, WPS uses the 2.4Ghz band by default, so you should change the frequency to 5GHz.
Before that, disable the WPS function, click “Switch Frequency”, and then re-enable WPS. Go to the “WPS Method” section, tap on “Push Button”, and click “Apply to complete the setup process.
Steps for Asus Rog Rapture GT-AX11000 Setup using WPS Button
The Asus Rog Rapture AX-11000 has a WPS button. It can be used to set up the device in minutes. Hold the button for at least 5-10 seconds to scan the available WPS devices. Enable the “Standby Mode” before starting this process. Wait until the setup wizard opens and enter the Client PIN code.
Select “Start” to operate the device in the WPS mode. The WPS LED light will blink three times when the setup completes. Fail to set up the Asus tri-band router? Contact a router expert for immediate assistance.